
Troubleshooting Guide: Why Is My Dryer Not Drying Properly?
Your dryer may not be drying properly due to a clogged ventilation system, a malfunctioning heating element, or an overloaded dryer.
Are you frustrated with your dryer not drying your clothes properly? Don’t worry, we’re here to help!
In this comprehensive troubleshooting guide, we’ll explain why your dryer isn’t performing as it should and provide you with precise steps to fix it.
From checking power supply and gas connections to cleaning lint screens and vents, we’ll cover all potential issues.
By the end, you’ll have the knowledge to get your dryer back to optimal drying performance and your laundry routine back on track.
Key Takeaways
- Clean the lint screen after every load and the vent annually to prevent airflow restrictions and improve drying performance.
- Consider professional vent cleaning to ensure proper airflow and energy efficiency.
- Use the Auto Dry setting instead of Timed Dry for better drying results.
- If DIY attempts fail or the dryer is over 10 years old, consider seeking professional repair or replacing the dryer.
- Dryer not drying properly is a common problem that can be repaired.
- Regular maintenance, such as cleaning the vent system and lint trap, can help prevent drying issues.
- Dryer repair is a cost-effective alternative to buying a new dryer.
- Professional technicians with extensive experience in dryer repairs are available in San Diego.
Check for Clogged Dryer Vents
Regularly check for clogged dryer vents to ensure proper airflow and prevent issues with drying efficiency. A clogged dryer vent can hinder the airflow, causing your dryer to take longer to dry your clothes or not dry them at all. Troubleshooting this problem involves inspecting the vent for any obstructions, such as lint buildup or debris.
Start by disconnecting the dryer from the power source and removing the vent hose. Use a vacuum or a vent cleaning brush to remove any lint or debris from both the hose and the vent opening. Be sure to also check for any crushed or kinked areas in the vent that may be obstructing the airflow.
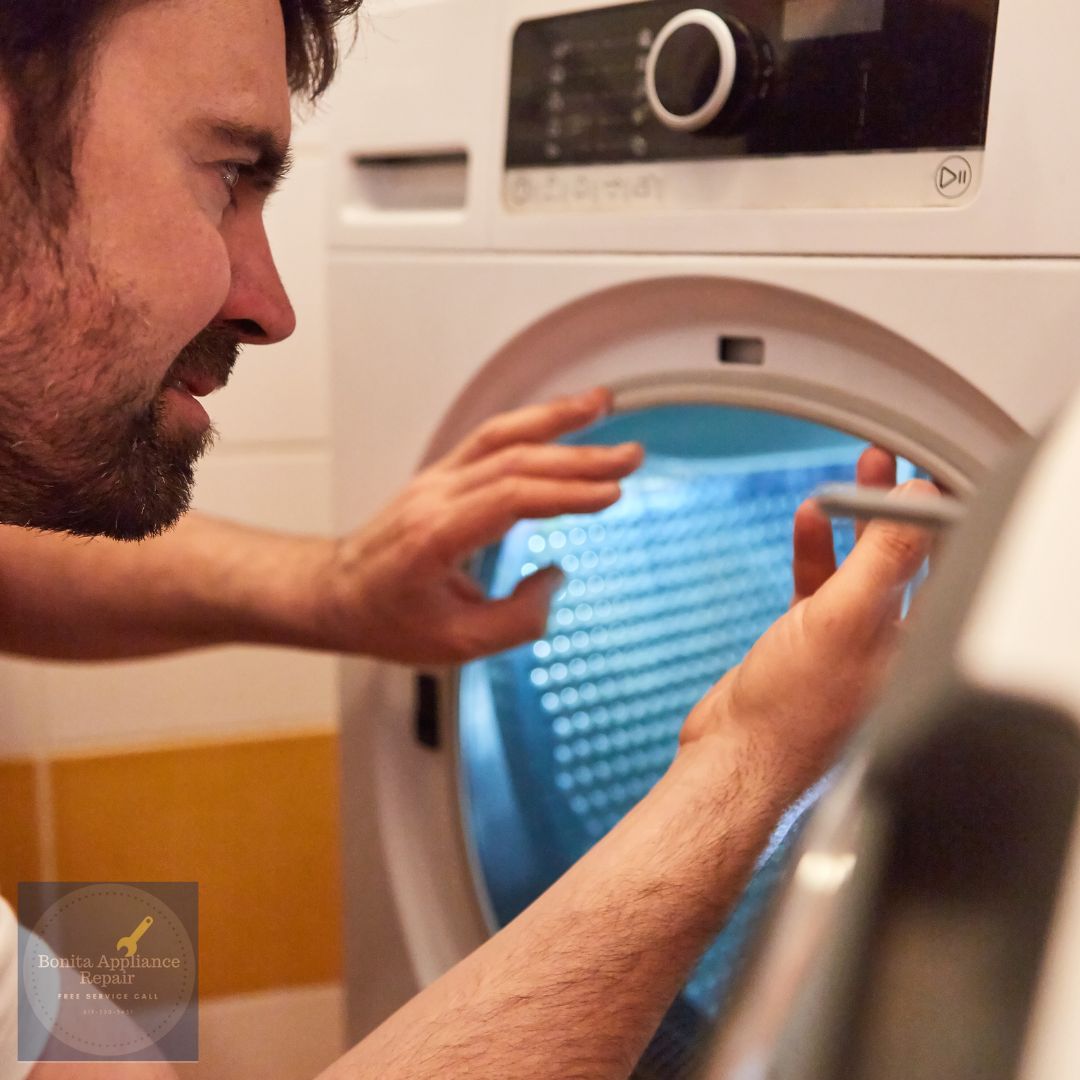
Inspect the Lint Filter for Buildup
To ensure proper airflow and prevent issues with drying efficiency, you should inspect the lint filter for buildup.
The lint filter is designed to capture lint and debris from your clothes, but over time, it can become clogged with lint, fabric softener residue, and other particles. This buildup can restrict the airflow in your dryer, leading to longer drying times and less effective drying.
To inspect the lint filter, simply remove it from the dryer and visually examine it for any visible buildup. If you notice a significant amount of lint or debris, it’s recommended to clean the lint filter thoroughly before placing it back in the dryer.
Regular inspection and cleaning of the lint filter will help maintain optimal drying performance.
Ensure Proper Airflow in the Dryer
You can ensure proper airflow in your dryer by checking for any obstructions. Proper airflow is essential for efficient drying. Here are four steps to ensure proper airflow:
Clean the lint screen: Remove the lint after every load to prevent blockage and restricted airflow.
Check the exhaust vent: Make sure the exhaust vent is clear of any lint or debris. A clogged vent can restrict airflow and lead to longer drying times.
Inspect the moisture sensor: If your dryer has a moisture sensor, ensure it’s clean and functioning properly. A dirty or faulty moisture sensor can affect the drying cycle.
Avoid overloading the dryer: Overloading the dryer can limit airflow and result in damp or partially dried clothes. Follow the manufacturer’s guidelines for load capacity to ensure proper airflow and drying efficiency.
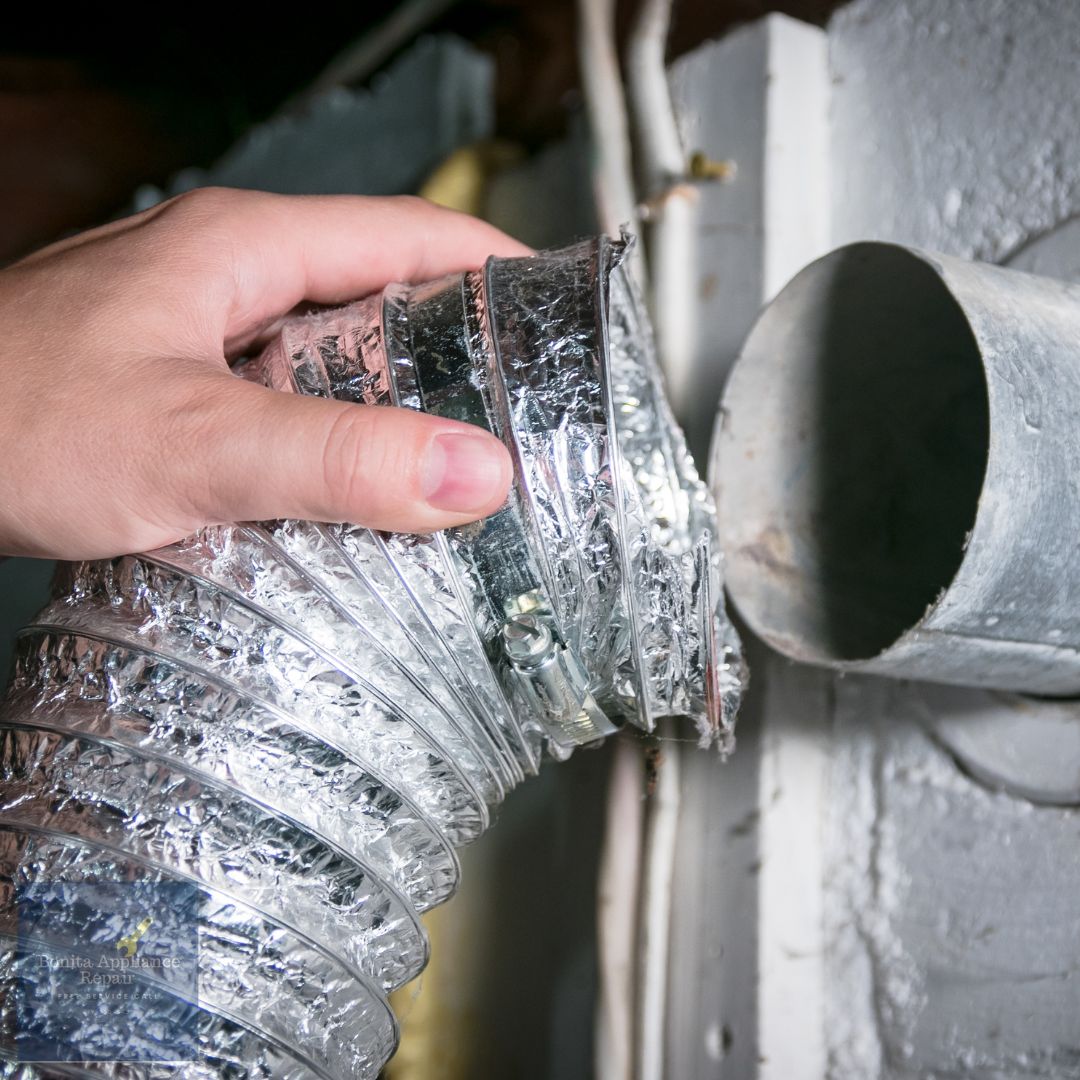
Examine the Exhaust Hose for Obstructions
Inspect your dryer’s exhaust hose for any obstructions. A blocked exhaust hose can prevent proper airflow, leading to your dryer not drying properly. Obstructions in the hose can include lint buildup, debris, or even a crushed or kinked hose.
To check for obstructions, follow these steps:
- Disconnect the dryer from the power source.
- Locate the exhaust hose at the back of the dryer.
- Remove the hose from the dryer and inspect it for any blockages.
- Use a flashlight to check for lint buildup or debris inside the hose.
- Straighten out any crushed or kinked areas in the hose.
If you find any obstructions, use a vacuum or a brush to remove them. Make sure the exhaust hose is properly connected and not damaged.
Clearing any obstructions in the exhaust hose will help improve airflow and ensure your dryer dries your clothes properly.
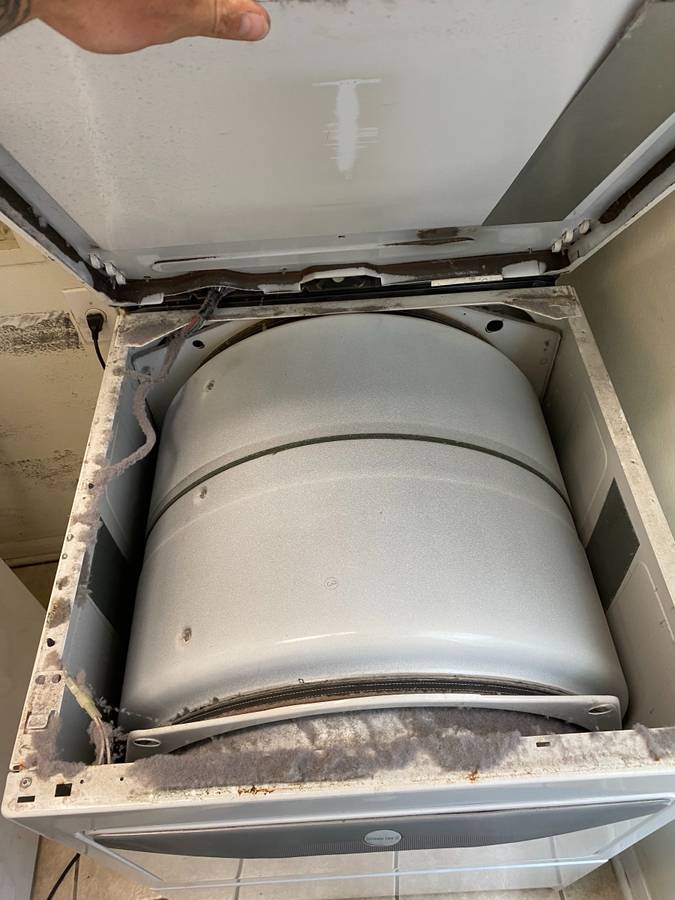
Clean the Dryer Drum for Optimal Performance
Clean the dryer drum regularly to ensure optimal performance. The dryer drum can accumulate lint and debris over time, which can hinder airflow and impede the drying process. Here are four steps you can take to clean the dryer drum effectively:
- Start by unplugging the dryer and removing any clothing or items from the drum.
- Use a damp cloth or sponge to wipe down the interior of the drum, removing any lint or residue. Pay special attention to the areas around the lint screen and the dryer vent.
- For stubborn stains or residue, you can use a mild detergent mixed with water to scrub the drum gently.
- After cleaning, allow the drum to dry completely before plugging the dryer back in and using it again.
Regularly cleaning the dryer drum will help maintain optimal airflow and ensure that your dryer is able to dry clothes efficiently.
Verify the Dryer Is Receiving Enough Power
To ensure proper functioning, check if your dryer has a reliable power supply.
Start by verifying that the dryer is plugged in and receiving power from a functioning power source. Make sure the circuit breaker for the dryer isn’t tripped and both circuits are functioning properly.
Additionally, check the timer on the dryer to ensure it’s set correctly and not causing any power issues. If the dryer isn’t receiving enough power, it may not be able to heat properly.
Test the Heating Element for Functionality
You can test the functionality of the heating element in your dryer by performing a simple diagnostic test. To do this, follow these steps:
Disconnect the dryer from the power source and locate the heating element. It’s usually located at the back of the dryer behind the drum.
Use a multimeter to test the continuity of the heating element. Set the multimeter to the ohms function and touch the probes to the terminals of the heating element. If the multimeter shows a reading of infinity, then the heating element is faulty and needs to be replaced.
If the heating element passes the continuity test, then the problem may lie with the thermostat. Test the thermostat for continuity using the same method as above. If the thermostat doesn’t show continuity, it may need to be replaced.
If both the heating element and thermostat are functioning properly, then the issue may be with another component of the dryer. It’s recommended to seek professional help at this point to further diagnose and repair the problem.
Check the Thermostat for Any Defects
To determine if the thermostat is the culprit behind your dryer not drying properly, start by checking for any defects. The thermostat is responsible for regulating the temperature inside the dryer. If it’s faulty or damaged, it may not accurately detect the temperature, leading to improper drying.
Begin by locating the thermostat, which is typically located near the heating element or burner assembly. Inspect the thermostat for any visible signs of defects, such as corrosion, loose connections, or burnt wires. Additionally, use a multimeter to test the thermostat for continuity.
If there are any defects found, the thermostat may need to be replaced. Remember to always follow the manufacturer’s instructions and consult a professional if needed.
Inspect the Timer and Controls
Continuing with the troubleshooting process, take a look at the timer and controls of your dryer. These components play a crucial role in the drying cycle and temperature setting, so it’s important to inspect them for any defects or malfunctions.
Here are four items to consider:
Control panel: Examine the control panel for any signs of damage or malfunction. Check if the buttons and knobs are working properly and if the display is functioning correctly.
Temperature setting: Ensure that the temperature setting on the dryer is appropriate for the type of clothing you’re drying. Make sure it’s set to the desired heat level and that it isn’t stuck or unresponsive.
Drying cycle: Check the drying cycle options on your dryer and make sure they’re functioning as intended. Test each cycle to ensure that it’s completing the full drying process.
Timer: Inspect the timer of your dryer to see if it’s accurately keeping track of the drying time. Make sure it isn’t running too fast or too slow, as this can affect the drying efficiency.
Examine the Door Switch for Proper Operation
Inspect the functionality of your dryer’s door switch to ensure proper operation.
The door switch plays a crucial role in the drying process, as it activates the heating element when the door is closed. If the door switch is faulty or not closing properly, it can prevent the dryer from heating or running but not drying your clothes effectively.
To examine the door switch, start by opening the dryer door and locating the door latch. Check if the latch is intact and engaging properly when the door is closed. If the latch is loose or damaged, it may need to be replaced.
Additionally, ensure that the door is closing fully and securely.
If there are any issues with the door switch, consider contacting a professional for repair or replacement.
Test the Moisture Sensor for Accuracy

Now, let’s move on to the next step in troubleshooting why your dryer isn’t drying properly. You need to test the moisture sensor for accuracy. The moisture sensor plays a crucial role in determining when your clothes are dry and signaling the dryer to stop.
Here are four steps to test the moisture sensor for accuracy:
Start by ensuring that the load size is appropriate for your dryer. Overloading the dryer can lead to uneven drying and inaccurate sensor readings.
Consider the fabric type of the clothes you’re drying. Different fabrics have different drying times, so the sensor may need calibration for accurate readings.
Clean the moisture sensor with a soft cloth and mild detergent. Any residue or buildup on the sensor can affect its performance.
Conduct a test run with a small load of laundry. Observe if the dryer stops at the appropriate time and if the clothes are completely dry. If not, you may need to recalibrate or replace the moisture sensor.
Ensure the Dryer Is Level and Stable
To ensure proper drying performance, make sure your dryer is level and stable. If your dryer isn’t level, it can cause issues such as taking too long to dry, not spinning properly, or becoming blocked.
Start by checking that your dryer is sitting on a flat surface and adjust the leveling feet if necessary. Use a level tool to ensure that the dryer is perfectly level from front to back and side to side.
If the dryer is unstable, it may vibrate excessively during operation, leading to poor drying results. Make sure that all four corners of the dryer are firmly supported and that there are no obstructions or objects blocking the dryer’s movement.
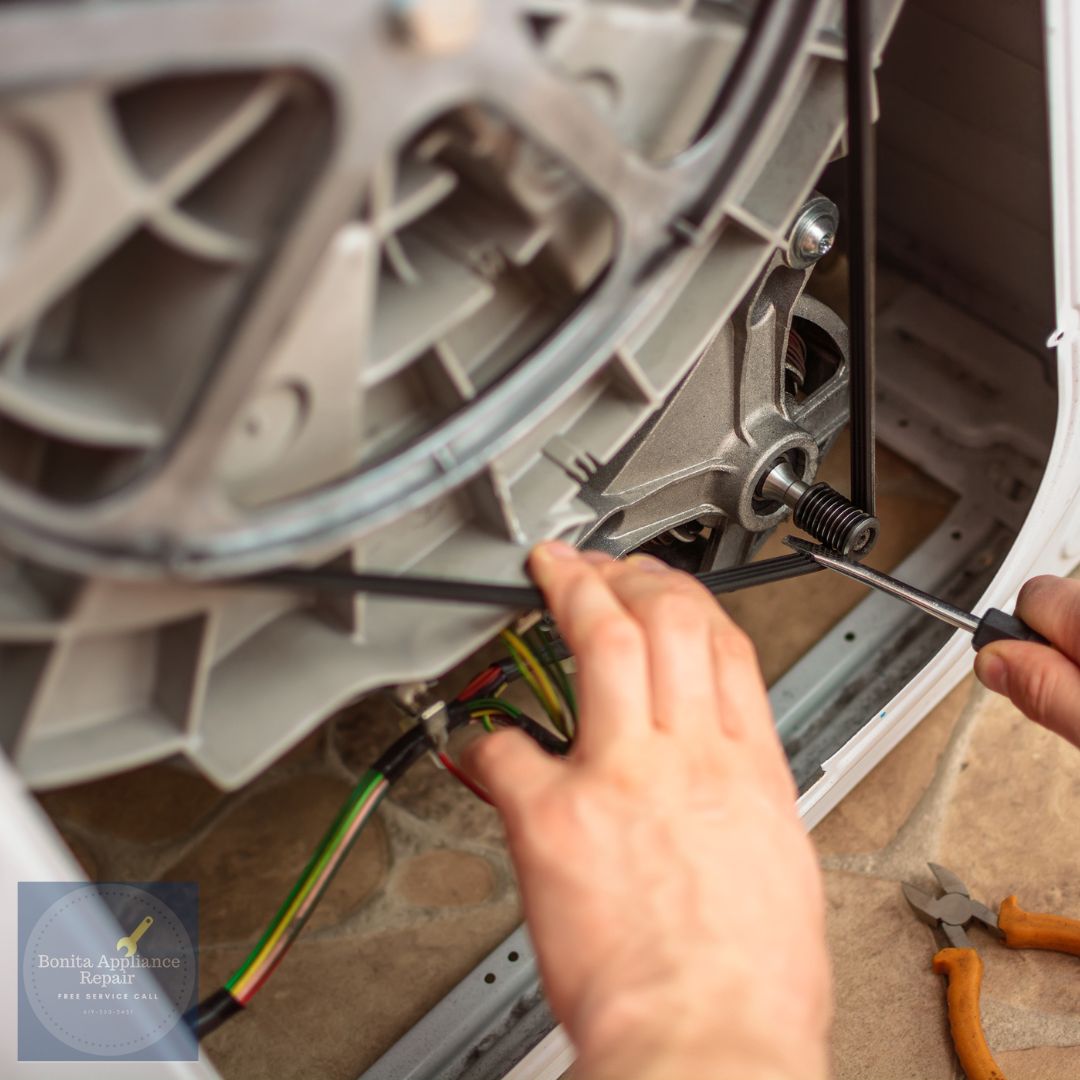
Verify the Drum Belt Is Intact and Tight
Check if your drum belt is intact and tight. The drum belt is responsible for rotating the drum of the dryer, allowing it to properly dry your clothes. If the drum belt is loose or broken, it can prevent the drum from spinning effectively, resulting in poor drying performance. Here are four things to check regarding your drum belt:
Visual inspection: Look for any signs of damage or wear on the drum belt. It should be smooth and free from fraying or cracks.
Tension: Ensure that the drum belt is tight and properly tensioned. If it’s loose, it may need to be adjusted or replaced.
Alignment: Check that the drum belt is properly aligned with the drum and the motor pulley. Misalignment can cause the belt to slip or come off completely.
Pulley condition: Examine the motor pulley for any signs of damage or wear. A damaged or worn pulley can put strain on the drum belt and affect its performance.
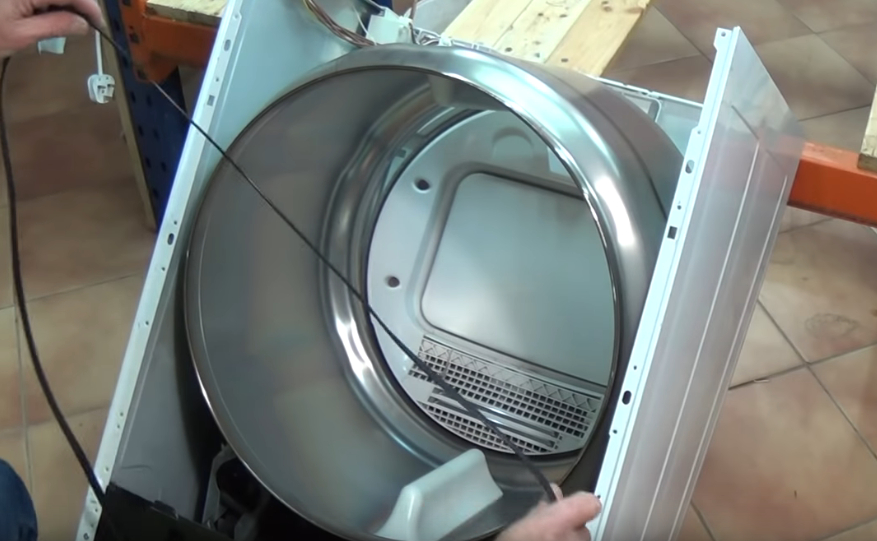
Check for Any Worn Drum Glides or Seals

If you have verified that your drum belt is intact and tight, the next step in troubleshooting why your dryer isn’t drying properly is to check for any worn drum glides or seals. Over time, these components can become worn-out or damaged, resulting in reduced airflow and inefficient drying.
To check for worn drum glides or seals, follow these steps:
- Disconnect the power to the dryer.
- Open the dryer door and locate the drum glides or seals along the edges of the drum.
- Inspect the drum glides or seals for any signs of wear or damage, such as fraying, cracking, or missing pieces.
- If you notice any worn-out or damaged drum glides or seals, they’ll need to be replaced.
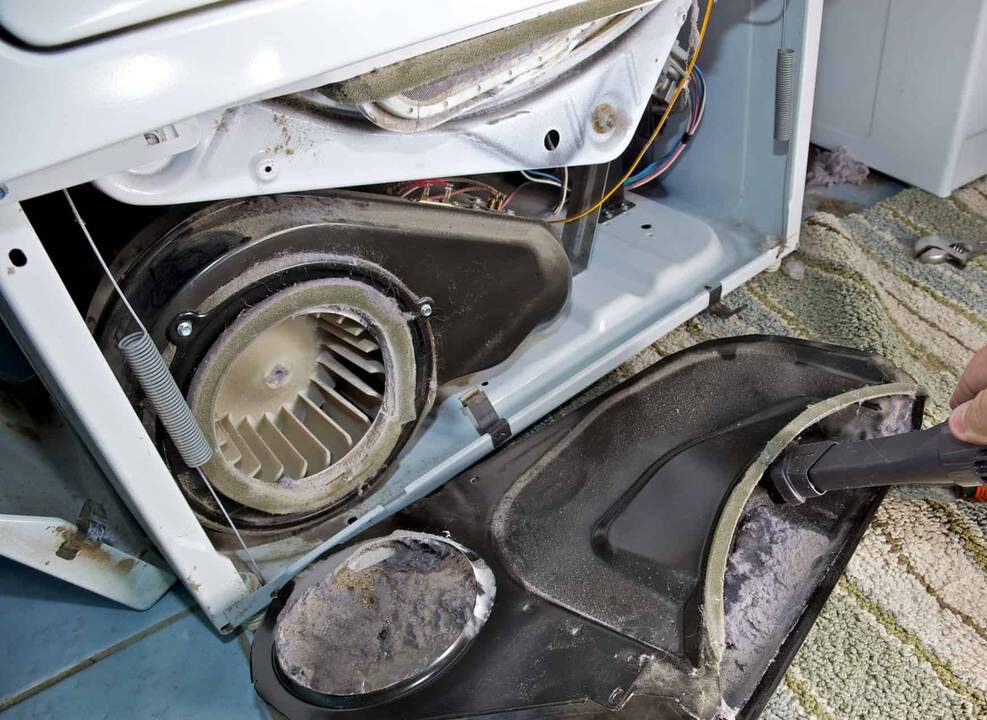
Inspect the Blower Wheel for Debris or Damage
Examine the blower wheel for any debris or signs of damage. The blower wheel is responsible for circulating air within the dryer, and if it’s clogged or damaged, it can hinder proper drying.
Here are four steps to inspect the blower wheel:
Disconnect the power: Before inspecting the blower wheel, ensure the dryer is unplugged to prevent any accidents.
Access the blower wheel: Remove the dryer’s front or rear panel, depending on the model, to gain access to the blower wheel.
Check for debris: Look for any lint, dirt, or other debris that may have accumulated on the blower wheel. Use a flashlight to get a clear view.
Inspect for damage: Examine the blower wheel for any signs of cracks, chips, or other damage. If you notice any, it may need to be replaced.
Regularly inspecting the blower wheel for debris or damage is essential for ensuring proper airflow and efficient drying performance.
Test the Motor for Proper Function
Continuing with the inspection of the dryer components, you can ensure proper functionality by testing the motor.
The motor plays a crucial role in the drying process, as it’s responsible for spinning the drum and circulating the hot air. If the motor isn’t functioning correctly, it can result in the dryer producing no heat or shutting off prematurely.
To test the motor, start by disconnecting the power supply and removing the dryer’s back panel. Locate the motor and check for any visible signs of damage or debris.
Use a multimeter to test the motor’s continuity and resistance. If the motor fails these tests, it may need to be replaced. Consult a professional if you’re unsure about performing this task yourself.
Examine the Igniter or Gas Valve for Issues
To continue troubleshooting your dryer not drying properly, let’s now focus on examining the igniter or gas valve for any issues. These components play a crucial role in heating your dryer, so it’s important to ensure they’re functioning correctly.
Here are four things to check:
Check for overheating: If the igniter or gas valve is overheating, it can cause the dryer to not dry properly. Look for any signs of overheating such as discoloration or burning smells.
Inspect for faulty connections: Make sure all the connections to the igniter and gas valve are secure and not damaged. Faulty connections can prevent the proper flow of gas and hinder the drying process.
Test the igniter: Use a multimeter to check if the igniter is working properly. If it’s not generating enough heat, it may need to be replaced.
Check the gas valve: Ensure that the gas valve is opening and closing correctly. A faulty gas valve can prevent the flow of gas to the dryer, resulting in inadequate drying.
Check the Airflow Through the Venting System
To ensure that your dryer is drying properly, it is essential to check the airflow through the venting system. A restricted or blocked vent can impede the flow of air, causing your dryer to take longer to dry your clothes or not dry them at all. Here are some key components to check in the venting system:
| Component | Description | Potential Issues |
|---|---|---|
| Air Vent | Ensure the air vent is clear from any obstructions. | Clogs or blockages can restrict airflow. |
| Blower | Check the blower for any debris or damage. | A malfunctioning blower can reduce airflow. |
| Heating | Verify that the heating element is functioning properly. | A faulty heating element can prevent proper drying. |
Inspect the Circuit Breaker or Fuse Box
Check if your circuit breaker or fuse box is functioning properly. This step is important because a malfunctioning or faulty circuit breaker or fuse can disrupt the power supply to your dryer, causing it to not dry properly. Here are four items to consider when inspecting the circuit breaker or fuse box:
Check for tripped breakers: Look for any breakers that are in the middle position or not fully switched on. Reset them by flipping them off and then back on.
Inspect for burnt or melted fuses: If you have a fuse box, visually inspect the fuses for any signs of burning or melting. Replace any dirty or burnt fuses with new ones of the correct amperage.
Examine the connections: Ensure that all the connections in the circuit breaker or fuse box are secure and tight. Loose connections can cause power interruptions.
Test the voltage: Use a multimeter to check if the circuit breaker or fuse box is providing the correct voltage to the dryer. If the voltage isn’t within the specified range, it may indicate a faulty circuit breaker or fuse.
Consider Professional Repair or Replacement Options
If you’ve exhausted all DIY troubleshooting options and your dryer is still not drying properly, it’s time to consider seeking professional repair or exploring replacement options.
A professional repair technician can accurately diagnose and fix any issues with your appliance, ensuring that it functions efficiently and effectively. They have the expertise and specialized tools to troubleshoot and repair complex dryer problems.
In some cases, it may be more cost-effective to replace the dryer if it’s old or if the repairs are extensive. Upgrading to a new appliance can also provide you with improved features and energy efficiency.
Dryer Not Drying Repair in San Diego
Are you frustrated with your dryer not drying your clothes properly? You’re not alone. It can be incredibly frustrating when your dryer isn’t functioning as it should, leaving your clothes damp and unwearable.
But don’t worry, help is just a phone call away. In San Diego, we offer professional dryer repair services to get your appliance back up and running in no time. Our experienced technicians specialize in diagnosing and fixing a wide range of dryer issues.
Contact us today and let us take care of your dryer not drying repair needs.
Common Causes of Dryer Not Drying
Are you wondering why your dryer isn’t drying properly? There are several common causes for this issue.
One possible culprit is a clogged lint filter, which can restrict the airflow and prevent proper drying.
Another potential cause is a malfunctioning moisture sensor, which may not accurately detect the level of moisture in your clothes and result in incomplete drying.
It’s important to regularly clean the lint filter to ensure proper airflow and replace any faulty moisture sensors.
By addressing these issues, you can improve the performance of your dryer and ensure that your clothes are fully dried.
If you’re experiencing any of these problems, it’s recommended to seek professional dryer repair services to diagnose and fix the issue effectively.
Signs of a Faulty Heating Element
If your dryer isn’t drying properly, one possible cause to consider is a faulty heating element. The heating element is responsible for generating the heat needed to dry your clothes.
Here are three signs that indicate a faulty heating element:
Clothes are still damp: If your dryer is running but your clothes aren’t fully dried after a cycle, it could be a sign that the heating element isn’t functioning properly.
No heat or low heat: If your dryer is running but you notice that it’s not producing any heat or the heat isn’t as strong as it should be, it could be a sign of a faulty heating element.
Longer drying times: If you find that your dryer is taking longer than usual to dry your clothes, it could be due to a faulty heating element. The reduced heat output can significantly increase the drying time.
If you’re experiencing any of these issues, it’s recommended to contact a professional dryer repair service to diagnose and repair the faulty heating element.
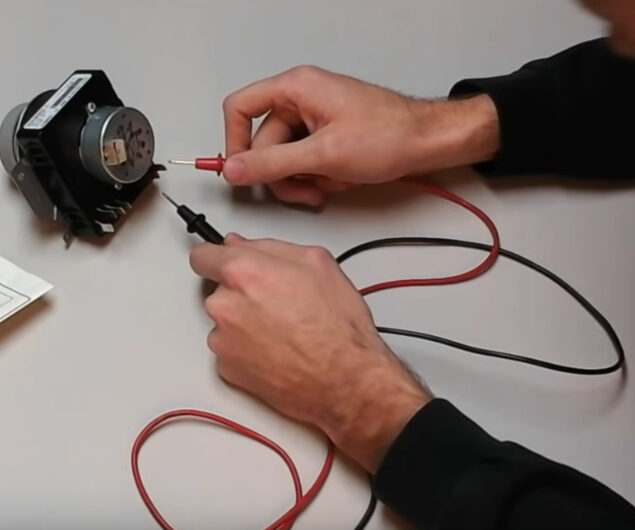
How to Check the Thermostat for Malfunction
To check for a malfunctioning thermostat in your dryer, you need to perform a simple diagnostic test.
First, unplug the dryer and locate the thermostat, which is usually found near the heating element or on the blower housing.
Use a multimeter to check the continuity of the thermostat. Set the multimeter to the lowest ohms setting and touch the thermostat’s terminals with the meter’s probes.
If the multimeter shows a reading of infinity or no continuity, then the thermostat is faulty and needs to be replaced.
However, if the multimeter shows a reading of zero or low resistance, then the thermostat is functioning properly.
If you’re unsure about performing this test or need assistance with dryer repair, it’s best to contact a professional technician.
Importance of Cleaning Dryer Vents Regularly
Regularly cleaning dryer vents is essential for maintaining optimal performance and preventing potential hazards. Neglecting to clean the exhaust vent can lead to a variety of problems, including clogged dryer vents. Here are three reasons why cleaning your dryer vents regularly is important:
Improved efficiency: When dryer vents are clogged with lint and debris, the airflow is restricted, causing the dryer to work harder and take longer to dry clothes. Cleaning the dryer vent allows for better airflow and improves the efficiency of your dryer.
Reduced fire risk: Clogged dryer vents are a major fire hazard. Lint is highly flammable, and when it accumulates in the vent, it can ignite easily. Regularly cleaning the dryer vent helps remove lint buildup and reduces the risk of a fire.
Extended lifespan of the dryer: When a dryer is forced to work harder due to a clogged vent, it puts additional strain on the motor and other components. This can lead to premature wear and tear, shortening the lifespan of the dryer. Cleaning the dryer vent regularly helps to maintain the longevity of your appliance.
Steps to Unclog Dryer Vents in San Diego
Regular maintenance is crucial for preventing clogged dryer vents and ensuring optimal performance of your dryer in San Diego. If you’re experiencing issues with your dryer not drying properly, it may be due to clogged vents. To unclog dryer vents, follow these steps:
- Disconnect the dryer from the power source.
- Locate the vent opening on the outside of your home.
- Remove any debris or obstructions from the vent opening.
- Use a vent brush or vacuum cleaner to clean the vent pipe from both ends.
- Check the vent hose behind the dryer for any blockages or kinks.
- Remove any lint or debris from the vent hose.
- Reconnect the vent hose to the dryer and secure it tightly.
- Plug the dryer back into the power source.
By regularly unclogging your dryer vents, you can ensure efficient drying performance and reduce the risk of fire hazards.
If you need assistance with unclogging your dryer vents in San Diego, contact a professional dryer repair service for help.
How to Test the Dryer’s Airflow
To determine if your dryer is experiencing airflow issues, you can perform a simple test. Here are the steps you can follow:
Start by checking the air vent: Ensure that the air vent isn’t blocked or clogged with lint or debris. A blocked vent can restrict the airflow and cause your dryer to take longer to dry clothes.
Test the blower: Turn on your dryer and feel for the airflow at the back of the machine. If there’s little to no airflow, it may indicate a problem with the blower. The blower is responsible for circulating air through the dryer and pushing it out through the vent.
Check the airflow throughout the drying cycle: During a drying cycle, monitor the airflow from the vent. If the airflow is weak or inconsistent, it may indicate a problem with the airflow system. This could be a result of a clogged vent or a malfunctioning blower.
Reasons for a Damaged Dryer Belt
One common reason for a damaged dryer belt is excessive wear and tear from constant usage. The dryer belt is responsible for rotating the drum and allowing the clothes to dry properly. When the dryer belt becomes worn out or damaged, it can result in the dryer not drying the clothes effectively. This can be frustrating and inconvenient for homeowners.
The constant movement and tension on the dryer belt can cause it to fray, crack, or break over time. Additionally, if the dryer belt isn’t properly aligned or tensioned, it can put additional strain on the belt, leading to damage.
If you notice that your dryer isn’t drying your clothes as it should, it’s important to have the dryer belt inspected and repaired by a professional to ensure optimal performance.
Repairing a Broken Dryer Belt in San Diego
If you have noticed that your dryer belt is broken in San Diego, it’s essential to get it repaired promptly to ensure your dryer can effectively dry your clothes. Here are three key steps to repairing a broken dryer belt:
Disconnect the power: Before starting any repair work, make sure to unplug the dryer from the electrical outlet to avoid any accidents or injuries.
Access the belt: Remove the dryer’s front panel or top panel, depending on the model, to access the broken belt. Take note of the belt’s position and how it’s threaded around the drum and motor pulley.
Replace the belt: Install a new dryer belt by threading it around the drum and motor pulley according to the manufacturer’s instructions. Make sure the belt is properly tensioned and aligned before reassembling the dryer.
Troubleshooting a Faulty Dryer Door Switch
let’s delve into troubleshooting a faulty dryer door switch and how to resolve the issue.
If your dryer door latch isn’t working properly, it can cause the dryer to stop functioning or not dry your clothes effectively.
To troubleshoot this problem, start by checking if the door switch is broken or worn out. You can do this by opening the dryer door and pressing on the switch. If there’s no resistance or clicking sound, the switch may need to be replaced.
Another troubleshooting step is to inspect the door latch mechanism for any obstructions or damage. Clean or repair the latch as necessary.
If these steps don’t resolve the issue, it’s recommended to contact a professional for further assistance.
Steps to Replace a Faulty Dryer Door Switch
To replace a faulty dryer door switch, follow these steps carefully:
Disconnect the power: Before starting any repair work, ensure that the dryer is unplugged or the circuit breaker is turned off to prevent electrical shock.
Remove the control panel: Locate the screws or clips that secure the control panel to the dryer. Use a screwdriver or pry tool to remove them and carefully detach the control panel from the dryer.
Replace the faulty door switch: Locate the faulty door switch, which is typically located near the door opening. Disconnect the wiring harness connected to the switch and remove any screws or clips holding it in place. Install the new door switch by following the reverse steps.
Remember to wear protective gloves and take necessary precautions while working with electrical components.
If you’re unsure or uncomfortable with replacing the door switch yourself, it’s best to consult a professional dryer repair technician.
How to Fix a Malfunctioning Dryer Timer
To fix a malfunctioning dryer timer in San Diego, you need to follow these steps. First, unplug the dryer from the power source to ensure your safety. Next, locate the timer on the control panel of the dryer. Use a screwdriver to remove the screws holding the control panel in place. Once the control panel is removed, disconnect the wires connected to the timer. Take note of the placement of each wire for reassembly later. Remove the faulty timer by unscrewing it from the control panel. Install the new timer by screwing it into place and reconnecting the wires according to the notes you made earlier. Finally, reattach the control panel, plug in the dryer, and test the timer to ensure it is functioning properly.
| Step | Description |
|---|---|
| 1 | Unplug the dryer from the power source |
| 2 | Remove the control panel screws |
| 3 | Disconnect the wires from the timer |
| 4 | Remove the faulty timer |
| 5 | Install the new timer |
| 6 | Reconnect the wires |
| 7 | Reattach the control panel |
| 8 | Plug in the dryer and test the timer |
Signs of a Defective Dryer Motor
If you’re experiencing issues with your dryer not drying properly, one possible cause could be a defective dryer motor. Here are three signs to look out for:
Drum not spinning: If you notice that the drum isn’t spinning or is spinning inconsistently, it could be a sign of a faulty dryer motor. The motor is responsible for turning the drum, so if it’s not functioning properly, the clothes won’t be able to tumble and dry effectively.
No heat: Another indication of a defective dryer motor is when the dryer isn’t heating up. The motor plays a crucial role in powering the blower motor, which is responsible for circulating the hot air. If the motor is malfunctioning, it can prevent the blower motor from working, resulting in a lack of heat.
Unusual noises: A faulty dryer motor may produce strange noises such as grinding, squealing, or buzzing sounds. These noises can indicate that the motor is struggling or damaged and may need to be replaced.
If you notice any of these signs, it’s important to contact a professional dryer repair service to diagnose and fix the issue.
Replacing a Faulty Dryer Motor in San Diego
You can easily replace a faulty dryer motor in San Diego by following these steps.
First, unplug the dryer and turn off the gas supply, if applicable.
Remove the back panel of the dryer to access the motor.
Disconnect the wires connected to the motor, taking note of their positions.
Remove the mounting screws or bolts that secure the motor to the blower housing.
Take out the old motor and replace it with a new one, ensuring it’s properly aligned.
Reattach the mounting screws or bolts and reconnect the wires to the motor.
Replace the back panel of the dryer and plug it back in.
Test the dryer to ensure the new motor is functioning properly.
If the dryer still doesn’t dry, you may need to check the thermal fuse as well.
Importance of Proper Dryer Ventilation
Proper dryer ventilation plays a crucial role in ensuring efficient drying and preventing potential hazards. Here are three reasons why proper dryer ventilation is important:
Efficient Drying: Adequate ventilation allows hot air and moisture to escape from the dryer, allowing clothes to dry faster. Without proper ventilation, the hot air becomes trapped, resulting in longer drying times and potential damage to the dryer.
Safety: A poorly ventilated dryer can lead to a buildup of lint, which is highly flammable. This increases the risk of a fire hazard. Proper ventilation helps to remove lint and prevent the accumulation of flammable materials.
Energy Efficiency: With proper ventilation, the dryer can operate at its optimal efficiency, using less energy to dry clothes. This not only saves money on energy bills but also reduces the environmental impact.
Ensuring proper dryer ventilation is essential for efficient drying, safety, and energy efficiency. If you’re experiencing issues with your dryer not drying properly, it’s important to address the ventilation system as part of the repair process.
Cleaning the Lint Trap for Optimal Performance
To ensure optimal performance of your dryer, regularly clean the lint trap. The lint trap is located inside the dryer drum and is designed to catch lint and debris that may accumulate during the drying process. Over time, if the lint trap isn’t cleaned, it can become clogged, leading to reduced airflow and longer drying times.
Cleaning the lint trap is a simple and important maintenance task that should be done after every use of the dryer. To clean the lint trap, simply remove it from the dryer, peel off any lint or debris, and rinse it under running water. Make sure to thoroughly dry the lint trap before placing it back into the dryer.
Steps to Clean the Dryer Drum
To maintain optimal performance of your dryer, it’s important to regularly clean the lint trap and now we’ll discuss the next step: cleaning the dryer drum.
Here are three steps to effectively clean your dryer drum:
Start by unplugging the dryer and removing any clothes or items from the drum.
Use a damp cloth or sponge with mild soap and water to wipe down the interior of the drum. Pay special attention to any stains or residue, and make sure to clean all surfaces thoroughly.
Once you have cleaned the drum, rinse the cloth or sponge and wipe down the interior again to remove any soap residue. Finally, leave the dryer door open and allow the drum to air dry completely before using it again.
Regularly cleaning your dryer drum will help prevent lint buildup, improve drying performance, and extend the lifespan of your appliance.
Troubleshooting a Noisy Dryer
If your dryer is making a lot of noise, it’s important to troubleshoot the issue to identify and resolve the problem. Here are three possible causes of a noisy dryer that isn’t drying properly:
Loose or worn-out drum rollers: These rollers support the drum and can become noisy if they’re loose or worn. Inspect the rollers for signs of wear or damage and tighten or replace them if necessary.
Worn-out or damaged belt: The belt that spins the drum can become worn or damaged over time, causing it to slip or make loud noises. Check the belt for any signs of wear, cracking, or stretching, and replace it if needed.
Faulty blower wheel: The blower wheel helps circulate the hot air inside the dryer, but if it becomes loose or damaged, it can create a loud noise and affect the drying performance. Examine the blower wheel for any damage or debris and replace it if necessary.
Common Dryer Error Codes and Their Solutions
Continuing the troubleshooting process, address the common dryer error codes and provide their corresponding solutions.
When your dryer displays an error code, it’s indicating a specific problem that needs to be addressed. One common error code is E1, which typically indicates a problem with the thermistor or temperature sensor. To resolve this issue, check the wiring connections and replace the faulty component if necessary.
Another common error code is AF, which stands for ‘air flow.’ This code usually indicates a clogged or restricted vent. Clean the vent system and ensure proper airflow to resolve this issue.
Finally, if your dryer displays an error code such as F3 or F4, it may be related to a problem with the temperature setting. Check the temperature controls and make sure they’re set correctly.
Professional Dryer Repair Services in San Diego
To address your dryer repair needs in San Diego, our professional technicians offer reliable and efficient services to ensure your dryer is working properly. When you choose our professional dryer repair services, you can expect:
Prompt and accurate diagnosis: Our technicians have extensive knowledge and experience in diagnosing various dryer issues, including dryer not drying problems. They’ll quickly identify the root cause of the problem and provide an effective solution.
Expert repairs: Our skilled technicians are equipped with the necessary tools and expertise to repair dryers of all brands and models. Whether it’s a faulty thermostat, broken terminal block, or malfunctioning motor, we can fix it efficiently.
Customized solutions for fabric type: We understand that different fabrics require different drying temperatures and settings. Our technicians will ensure that your dryer is calibrated correctly to provide optimal drying results for various fabric types.
Don’t let a malfunctioning dryer disrupt your laundry routine. Contact us for professional dryer repair services in San Diego and get your dryer back to working efficiently.
Frequently Asked Questions
How Often Should I Clean My Dryer Vents?
You should clean your dryer vents at least once a year to maintain optimal performance and safety. Regular cleaning helps prevent lint buildup, which can cause your dryer to take longer to dry clothes and increase the risk of a fire hazard.
What Are the Signs of a Faulty Heating Element in a Dryer?
If your dryer’s heating element is faulty, you may experience several signs.
One common sign is that your clothes aren’t drying properly, even after a full cycle.
You may also notice that your dryer isn’t producing enough heat or no heat at all.
Another indication is if your dryer takes longer than usual to dry your clothes.
If you’re experiencing any of these issues, it’s important to have your heating element checked and repaired by a professional technician.
How Can I Test the Airflow of My Dryer?
To test the airflow of your dryer, start by disconnecting the vent hose and running the dryer.
Place your hand near the vent opening to feel for a strong, steady airflow.
If the airflow is weak or nonexistent, there may be a blockage in the vent system.
Clean the vent system thoroughly, removing any lint or debris.
If the problem persists, it’s best to contact a professional dryer repair service for further assistance.
What Are the Reasons for a Damaged Dryer Belt?
The most common reasons for a damaged dryer belt are wear and tear over time and improper installation.
Overloading the dryer with heavy items can also strain the belt and cause it to break.
Additionally, if the belt isn’t aligned properly or if there’s excessive tension, it can lead to damage.
Regular maintenance and proper usage can help prevent belt damage and ensure smooth functioning of your dryer.
How Do I Troubleshoot a Noisy Dryer?
To troubleshoot a noisy dryer, start by checking for any loose or worn parts. Inspect the drum bearings, rollers, and idler pulley for signs of damage or excessive wear. Tighten any loose screws or bolts.
If the noise persists, the problem may be with the motor or blower wheel. In that case, it’s best to call a professional dryer repair service in San Diego for expert assistance.
How Do I Test the Moisture Sensor in My Dryer for Accuracy?
To test the moisture sensor in your dryer for accuracy, follow these steps.
First, locate the moisture sensor, usually found near the lint screen. Ensure it’s clean and free of any debris.
Next, select a load of laundry that’s partially damp but not completely dry. Place the load in the dryer and start a cycle.
Monitor the drying time and check if the sensor accurately detects the moisture level.
If you notice any inconsistencies, it may be necessary to recalibrate or replace the moisture sensor.
What Are Some Common Issues That Can Cause the Dryer Drum to Not Spin Properly?
If your dryer drum isn’t spinning properly, there could be several common issues to consider.
First, check if the belt that connects the drum to the motor is intact and not worn out.
Additionally, inspect the idler pulley and drum rollers for any signs of damage or wear.
It’s also important to ensure that the motor and drive system are functioning correctly.
If these troubleshooting steps don’t resolve the issue, it may be necessary to seek professional help or consider replacing the dryer.
How Can I Check if the Thermostat in My Dryer Is Defective?
To check if the thermostat in your dryer is defective, you can use a multimeter to test for continuity.
Disconnect the power and access the thermostat located near the heating element.
Remove the wires and place the multimeter probes on the thermostat terminals.
If there’s no continuity, the thermostat is likely defective and needs to be replaced.
Refer to the owner’s manual or consult a professional for specific instructions and to ensure proper safety precautions are taken.
What Are the Signs of a Worn Drum Glide or Seal in a Dryer?
Signs of a worn drum glide or seal in a dryer include:
- Excessive noise
- Clothes getting caught or torn
- Reduced drying efficiency
If you notice these issues, it may be time to check the drum glide and seal for wear or damage. Look for signs of fraying, cracking, or misalignment.
Replace the worn parts to ensure smooth and efficient operation of your dryer. Consult the owner’s manual or seek professional assistance for specific instructions on replacing these components.
How Can I Test the Motor in My Dryer to Ensure It Is Functioning Correctly?
To test the motor in your dryer and ensure it’s functioning correctly, you can follow these steps.
First, disconnect the power supply to the dryer.
Then, remove the front or back panel to access the motor.
Use a multimeter to check for continuity between the motor terminals.
If there’s no continuity, the motor may be faulty and needs to be replaced.
If there’s continuity, the motor is likely working fine, and you should further troubleshoot other components of the dryer.
Conclusion
In conclusion, troubleshooting your dryer not drying properly can be a frustrating experience, but with the steps outlined in this guide, you can identify and resolve the issue.
By checking for clogged vents, inspecting the lint filter, and ensuring proper airflow, you can address potential blockages that may be hindering the drying process.
Additionally, examining the exhaust hose and cleaning the dryer drum are important steps to take in order to ensure efficient drying. These components can accumulate lint and debris over time, which can reduce airflow and impede drying performance.
Finally, if you have exhausted all troubleshooting steps and your dryer still fails to dry properly, it may be time to consider professional repair or replacement options. A qualified technician can diagnose and fix any underlying issues that may be causing the problem.
By following these steps and considering all possible factors, you can get your dryer back to optimal drying performance and keep your laundry routine on track.
In conclusion, if you’re experiencing issues with your dryer not drying properly in San Diego, our professional repair services can help.
Our experienced technicians specialize in diagnosing and fixing a wide range of dryer problems, from faulty heating elements to clogged vents and leaking issues.
By scheduling an appointment with us, you can avoid the hassle and expense of buying a new dryer.
Don’t wait any longer, call Bonita Appliance repair at 619-329-5938 to get your dryer back up and running efficiently.